Master Grain-Free Waffles: Tips for Light & Crispy + Berry Compote
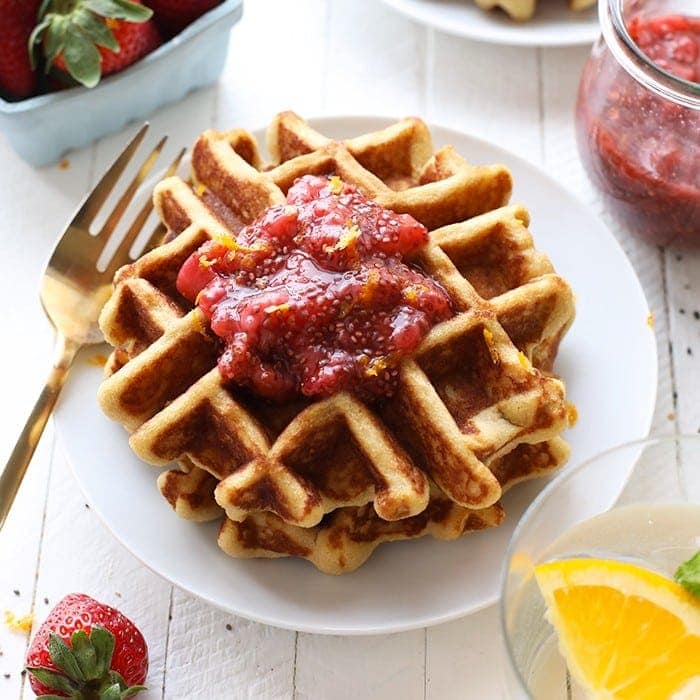
Imagine a stack of golden-brown waffles, perfectly crisp on the outside, incredibly light and fluffy on the inside, all without a single grain in sight. Now, picture them generously adorned with a vibrant, naturally sweet homemade strawberry chia compote. Sounds like a dream, doesn't it? Well, this dream is about to become your delicious reality. Whether you're navigating a gluten-free lifestyle, following a paleo diet, or simply looking for a wholesome and incredibly satisfying breakfast (or "brinner"!), mastering grain free waffles with homemade strawberry chia compote is a culinary triumph that's well within your reach.
Forget dense, chewy imitations. This guide will walk you through the secrets to achieving truly spectacular grain-free waffles that are a staple in many kitchens, thanks to the harmonious blend of almond and coconut flours. Get ready to elevate your breakfast game!
The Grain-Free Advantage: Why Almond & Coconut Flour Waffles Shine
Venturing into grain-free baking opens up a world of delightful possibilities, especially when it comes to waffles. The primary stars of our show are almond flour and coconut flour, two powerhouse ingredients that offer both flavor and health benefits without compromising on texture.
- Almond Flour: Made from finely ground almonds, this flour is rich in protein, healthy fats, and vitamin E. It imparts a delicate, nutty flavor and contributes to a tender, moist crumb in baked goods. For waffles, it provides a crucial part of the structure and richness.
- Coconut Flour: A highly absorbent flour made from dried coconut meat, coconut flour is packed with fiber and boasts a naturally sweet, tropical essence. Its unique absorbency is key in grain-free baking, helping to create a stable batter while adding a subtle sweetness.
Together, these flours create a robust foundation for fluffy almond flour paleo waffles that are both satisfying and structurally sound. It's important to note that these flours are quite distinct from traditional wheat flour, and even from each other. Due to their vastly different absorption rates and binding properties, we strongly advise against substituting them 1:1 in this recipe. They work in tandem to achieve the perfect balance, and altering that balance can lead to unexpected (and often undesirable) results. However, feel free to experiment with different liquid sweeteners like maple syrup or agave instead of honey, and any milk variety you prefer – dairy or non-dairy will work beautifully.
Crafting Your Perfect Grain-Free Waffles: Tips for Light & Crispy Texture
Achieving that coveted light and crispy texture in grain-free waffles requires a few key techniques. It's not just about the ingredients; it's how you bring them together and how you cook them.
The Art of Mixing: Order Matters
The sequence in which you combine your ingredients plays a surprisingly significant role in the final texture of your grain-free waffles. We recommend a three-step mixing process:
- Wet First (Minus Coconut Oil): In a large bowl, thoroughly whisk together all your wet ingredients – eggs, milk, sweetener, and any extracts (like vanilla) – except for the melted coconut oil. This ensures a smooth, uniform base.
- Dry Next: In a separate, medium-sized bowl, combine your dry ingredients: almond flour, coconut flour, baking powder, and a pinch of salt. Whisk them well to ensure even distribution of the leavening agents.
- Combine & Finish with Coconut Oil: Add the dry ingredients to the wet mixture and mix until just combined. The batter will be quite thick. Finally, pour in your melted coconut oil and mix again until fully incorporated.
Why add coconut oil last? This is a crucial trick! Cold ingredients like milk and eggs, especially if they come straight from the fridge, can cause melted coconut oil to solidify into small clumps. Adding it at the end, after the other ingredients have been partially mixed and brought closer to room temperature, helps prevent this solidification, ensuring a smooth, evenly distributed fat content for crispier waffles.
The Egg White Secret: For Ultimate Airiness
While delicious waffles can certainly be made by adding whole eggs directly to the batter, incorporating whipped egg whites is the secret weapon for achieving truly light-as-air, incredibly fluffy grain-free waffles. It's an extra step, but one that yields remarkable results.
- The Method: Carefully separate your egg whites from the yolks. In a clean, dry bowl (free of any grease), use an electric mixer to whip the egg whites until they form stiff, glossy peaks. This means when you lift the beaters, the peaks hold their shape and don't collapse.
- The Impact: The act of whipping incorporates air into the egg whites, which, when gently folded into your waffle batter, provides an incredible lift and delicate texture. The difference is palpable – waffles made with whipped egg whites are noticeably lighter and less dense.
- Skipping It: If you're short on time, don't have an electric mixer, or simply prefer to keep it simpler, you can absolutely skip this step and add the whole eggs directly with the other wet ingredients. Your waffles will still be delicious and golden-brown, just slightly denser. However, for that ultimate "light-as-air" experience, we highly recommend whipping!
Waffle Maker Wisdom: Achieving Golden Perfection
Once your batter is ready, it's time to fire up your waffle iron. Each waffle maker is unique, but these general guidelines will help you achieve perfectly cooked waffles:
- Preheat & Grease: Set your waffle maker to a medium-high heat. Allow it to fully preheat. Once hot, give both sides a generous spray with cooking spray to prevent sticking.
- Portioning: Using a 1/3 cup scoop is a good starting point for most standard waffle irons. Spoon the batter into the center and close the lid. Avoid overfilling, which can lead to messy overflow.
- Cook Time & The Touch Test: Cook time typically ranges from 2-4 minutes, but this will vary significantly depending on your specific waffle iron's wattage and settings. While many machines have indicator lights, they're not always perfectly accurate. We recommend the "touch test": gently lift the lid (if your iron allows) and touch the waffle. It should feel firm and springy to the touch, and look beautifully golden brown. If it feels soft or wet, close the lid and cook for another minute.
- Crispness Factor: For extra crispy edges, you can often cook them for an additional 30 seconds to a minute after the initial doneness.
- Preventing Soggy Waffles: As each waffle finishes cooking, transfer it directly to a wire cooling rack. Stacking them on a plate immediately after cooking will trap steam and make them soggy. The wire rack allows air to circulate, maintaining their crispiness.
Elevating Your Waffles: The Homemade Strawberry Chia Compote
While delicious on their own, our fluffy almond flour paleo waffles truly sing when paired with a fresh, homemade topping. And for grain free waffles with homemade strawberry chia compote, this vibrant topping is non-negotiable! It's incredibly easy to make, packed with natural sweetness and nutrients, and perfectly complements the nutty notes of the waffles.
This quick strawberry chia compote requires just a few basic ingredients:
- Fresh Strawberries: Washed, hulled, and quartered. You can use frozen strawberries as well, just note they'll release more liquid.
- Orange Juice: A splash brightens the flavor and adds a touch of natural sweetness. Lemon juice can also be used for a tangier profile.
- Chia Seeds: These tiny powerhouses are essential for thickening the compote naturally, without the need for cornstarch or pectin. They also add a boost of omega-3 fatty acids and fiber.
- Optional Sweetener: A tiny bit of honey or maple syrup can be added if your strawberries aren't super sweet, but often, the natural sugars are enough.
To make it: Simply combine the strawberries and orange juice in a small saucepan over medium heat. Bring to a gentle simmer, mashing the strawberries with a fork or potato masher as they soften, creating a chunky sauce. Simmer for about 5-7 minutes until the strawberries are tender and have released their juices. Remove from heat, stir in the chia seeds, and let it sit for 5-10 minutes. The chia seeds will absorb the liquid and thicken the compote to a beautiful consistency. Taste and adjust sweetness if desired.
Beyond strawberries, feel free to experiment with other berries like raspberries, blueberries, or a mixed berry compote. The possibilities are endless for customizing your perfect topping!
Beyond the Berries: Other Grain-Free Topping Ideas
While strawberry chia compote is a star, don't limit your imagination! Here are a few other grain-free friendly toppings to consider:
- Nut Butters: Almond, cashew, or pecan butter for extra protein and healthy fats.
- Whipped Coconut Cream: A dairy-free alternative to whipped cream, light and airy.
- Nuts & Seeds: Toasted slivered almonds, chopped pecans, or hemp seeds for crunch.
- Sugar-Free Syrup: A drizzle of your favorite keto or sugar-free maple-flavored syrup.
- Fresh Fruit: Sliced bananas, peaches, or a medley of berries.
Your Grain-Free Waffle Journey Awaits!
There's something truly special about the aroma of freshly cooked waffles filling your kitchen, especially when you know they're made with wholesome, grain-free ingredients. Mastering grain free waffles with homemade strawberry chia compote is not just about following a recipe; it's about understanding the nuances of grain-free baking, embracing new techniques, and enjoying the delicious rewards.
These light-as-air, crispy, and flavorful waffles are a testament to how incredible healthy eating can be. Whether for a leisurely weekend breakfast, a quick weeknight "brinner," or a special occasion, these grain-free delights will impress even the most discerning palates. So, go ahead, fire up your waffle iron, gather your ingredients, and embark on a delicious journey to waffle perfection. You deserve this treat!
